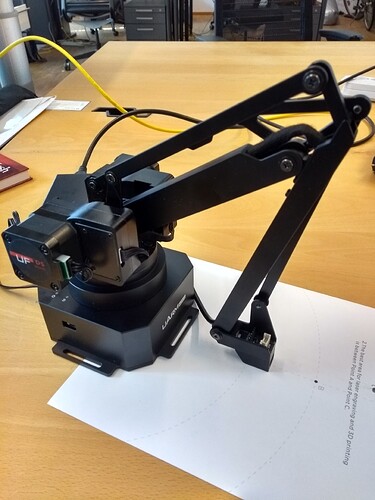
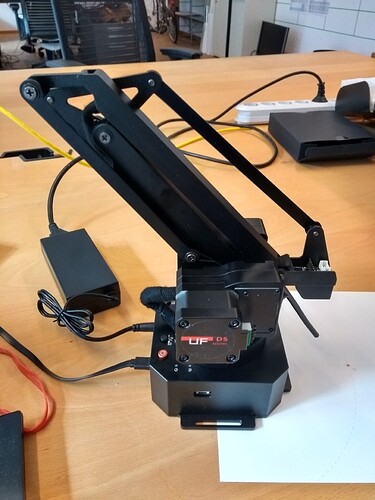
Movement out of limits

uArm Serial No.: C8FD19405647
Firmware Version: 3.1.9
Operation System: MacOS Sierra 10.12.5
uArm Controlling Method: Serial port direct commands

Hello, I’m using the communication protocol as specified in the Quick Start Guide to direct commands to my uArm Swift Pro. Is the P2242 command the reading of the absolute encoders for each joint ?

I don not understand why the uArm allows itself to go out of limits when the movement commanded takes it there. I mean, if there are absolute encoders that the firmware can read, then YOU (firmware programmers) can know when the next step for the motors affected by the movement will take them beyond mechanical limits and will produce the KLAK-KLAK noise and the uArm going nuts… I think there are a lot of users reporting that behaviour so, is this something you are going to fix in some future firmware versions ??

Please, do not misunderstand me… I love this robotic arm, its hardware is awesome and it performs pretty well and pretty stable… but the software provided, both firmware and desktop app are highly improvable.
Hey @YoHidden ,
If you look at the firmware ( GitHub - uArm-Developer/SwiftProForArduino: Swift Pro Firmware ), P2242 grabs the raw, analogue value from the Analogue pin connected to the AS5600 rotary sensor attached to each axis.

uint8_t uarm_gcode_P2242(char reply[])
{
	uint16_t value[3];

	for (int i = 0; i < 3; i++)

	{
		value[i] = get_current_angle_adc(i);
	}

	msprintf(reply, "B%d L%d R%d", value[0], value[1], value[2]);

	return E_OK;
}

I believe several people (including myself) are having issues where the values used to calibrate the arm are no longer in accordance with the values being read from the sensor, which would cause the arm to think it is in the wrong position and in some cases move outside of its safe limits. I have a full explanation here: UArm not calibrating position - #24 by tony

I am working on a way to write values into the EEPROM using GCodes which would allow a user to re-calibrate the arm, so I’ll let you know how I go.

In the mean time, I’m collecting data on other users having the same problem.

If you remove any attachments from the arm, place the arm on the flattest surface you can find, and align on top of the “Laser & 3D Printing Positioning” page that cam in the box, then use uArm Studio / Blockly and add a “Move To” block, then position your arm at points A, B and C, and record those positions, what positions does the software think you are at?

Here’s what I got:
A: [169.9, 0, -27.33]
B: [202.92, 0.93, -19.58]
C: [282.49, 2.16, -16.1]

Thanks.

Thanks for your suggestions, we are working on the firmware hardly and we are sure there are a lot of thing we are not doing well. From May to June, we were working hard on the hardware to make sure our backers could get the robot as soon as possible, while next step is to make the software better and better :grin:

1 Like

Hi @derwentx,

Thanks for your detailed explanation and the analysis you’re performing. These are the values I have got following your scenario…
A: [166.21, 0, -58.06]
B: [193.16, 0.89, -49.67
C: [272.34, 1.67, -49.5]

I’m including a photo of the first point A just to see we’re taking the same reference…

Hi @tony,

Thanks for your answer. I look forward to see how the software quality raises to mach the level of the awesome hardware you’ve built. I know it is a hard process and to be achieved step by step, so I’ll be patient for further improvements and willing to see how good this uArm platform can be.

1 Like

Just test mine,
A[165 -2 -55]
B[195 -0.3 -50]
C[274 0.8 -49]

@derwentx I have just told our engineer to add a simple calibration in next version of firmware since now we are using the special tool to calibrate it. Thanks

1 Like

Thanks @tony
Can you see the problem here we’re having?
If you move the arm around on a flat surface, the Z-axis should be approximately the same, but on most arms it appears that the arm thinks the arm is 5mm below where it actually is.
Also the physical distance between points A and B should be about 55.3mm but most arms think that distance is about 30mm.

On a perfect system, the data might look like this:
A: [ 140, 0, -50 ]
B: [ 195, 0, -50 ]
C: [ 275, 0, -50 ]

The problem is not just that the reference position has not been set correctly on the machines, but the function that calculates the cartesian coordinates from the arm angles is giving incorrect results.

1 Like

@tony

Indeed, that throw off any decent 3D printing test. Would i be correct in assuming this is on top of your list of thing to rectify?

Can’t wait for the software to match this awesome hardware.

Hey @derwentx.

I can’t put my uarm on point A, with no attachments, w/o lifting it. The arm doesn’t have enough freedom to reach that point, as shown in the picture @YoHidden posted. Could there be a hardware issue?

When I place the arm on points B & C, I get these readings:

B: [194.24, -0.89. -50.21]
C: [273.69, 1.68, -49.72]

.mm

@virtualritz @derwentx @tony

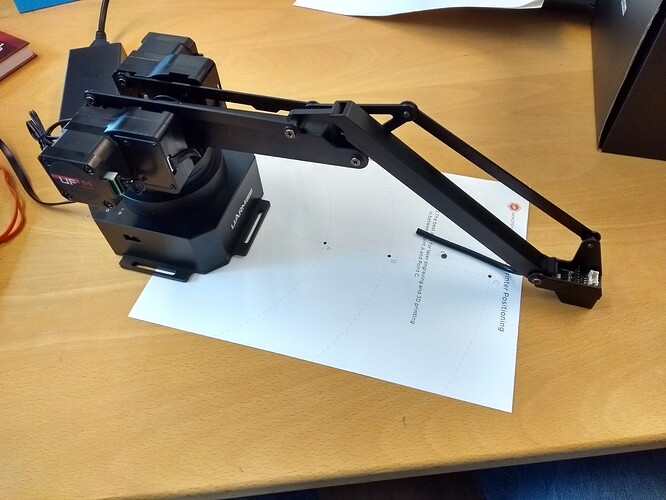
Interesting! mine doesn’t go to A either. See picture. This is a far back as it can.

The picture @Lalex posted matches the position that I get on my uarm when I want to reach A on the ground plane. Anything further back and the arm will lift.

.mm

Thanks @virtualritz
Mine only barely reaches point A, I have to sort of lift up the arm and push the upper (outermost) part of the arm inwards before it will reach, so try giving that a shot, making sure your work space is as flat as possible

If that doesn’t work, please send me photos of your arm, oriented in these maximum positions:


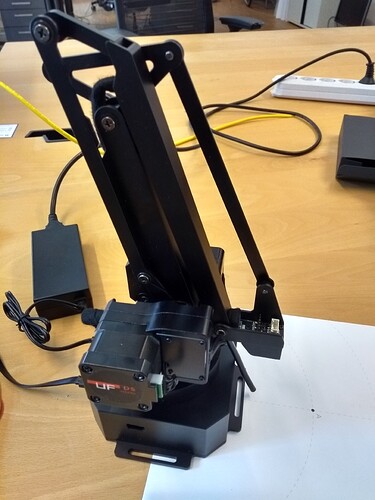
1st picture shows max extension,

2nd shows max folding (stopped by a rubber bumper that the arm has glued onto the inside, close to the ‘knee’ joint).

3rd shows how close I can get to A on the ground plane (around 2cm). Any closer and the arm will lift.

.mm

If the second photo shows you pushing the lower (inner) arm as far back as possible then it looks like yours doesn’t move as far back as mine which is interesting.

Maybe trying the same thing on your other arm will be enlightening.

Maybe that’s the angle I took the picture at. Here is a more side view that shows the max angle better.


It does look like I can push it as far back as yours.

.mm

I now tested with the 2nd uArm Swift Pro at home and this one can reach point A without issues!

So there is a manufacturing issue here. I will bring the other uArm home tomorrow and do a side-by-side comparison of movement limits.

.mm

1 Like

Dear uFactory, especially @tony

I can now confirm with 100% certainty that my two uArm Swift Pros have different limits of movement. One can go 2cm more and reach A completely, the other can’t. Both have the z-axis precision issue others have reported.

Please comment and advise what to do. Shall I send back the uArm with the limited movement? How is such a discrepancy possible?

It looks to me like a severe QA issue with the manual assembly process.

.mm

@virtualritz @derwentx Sorry for the late reply. The reason why the arm can not reach the A point is that the wire there. When doing the assembling, the worker didn’t realise that the length of wires would affect the limites of movement.


So thanks for you kindly report of that issue, I have reported it back to the supply chain and they will improve the steps.
While, for the calibration, now we are working on using the positioning paper to finish the calibration, and will release it soon. It will help the arm to be more accuracy.

@tony. So what do I do about the uArm that has the issue? Is there a fix that I could do myself, e.g. taking the cable attachment apart and cutting the cable? Maybe you could publish instructions?

.mm

The simplest way to do that is pull the wiring out a little bit. Here are the steps:
1, the original status


2, pull the wiring out a little bit

3,until no more wire in the end-effector

4,push the wire inside the lower arm which helps to avoid the pump tube to be bent

Please feel free to ask any questions about that! THANKS

2 Likes