uArm ClockBot
This tutorial will be all about creating a simple clock using a uArm Metal, some paper, and cleverness. This is the perfect project for a beginner who has never worked with this robot, and wants to use it for the first time for automation. Its also a great project for intermediate users who want usable code to mess around with.
This clock shows the minutes of a current hour. The program relies on a clean consistent environment with no wind or people to move the papers. The robot has no error checking other than a storage location that acts as a reset point for the papers location. It’s a great project for beginners who have just bought a uArm.
Step 1: Getting the Materials
- uArm Metal
- Several sheets of construction paper
- Tape
- Scissors
- A small 16"x20" area to work in (Alternatively, a white board or a poster board to mount the robot onto)
- Recommended but optional: Sculpting clay
Step 2: Making the Paper Segments and the Bank
There are two components to the crafting part of this project. First, you must cut out the “Paper Bank”. This is a little paper container that the robot will use to store all of the clock segments when they are not being used. The bank is very important, because it is used as a “reset point”- when papers are dropped into it, they fall into place, which ensures that the robot is always picking up the papers from the same spot. Without it, the robot would make mistakes that would add up over time and throw everything out of sync.
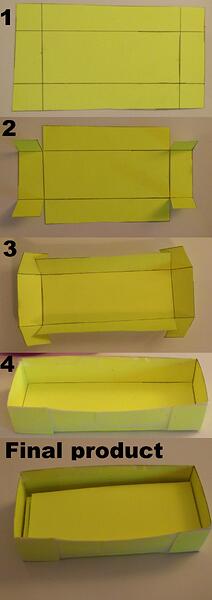
To make the paper bank, download and print this PDF of the paper bank, and follow the folding steps on the diagram above. Use tape on the last step to stick the tabs together.
The second step is to cut out 14 or more paper segments. To make these, download and print this pdf of the paper segments, and cut them all out. There are 16 on the pdf, which is best in case you lose some. Only 14 are needed to make two digital segments.
Step 3: Securing the Robot
The next step is to get the robot taped down. This is very important because if the robot moves even the slightest bit, it will eventually be out of sync with the location of the paper segments and the bank.
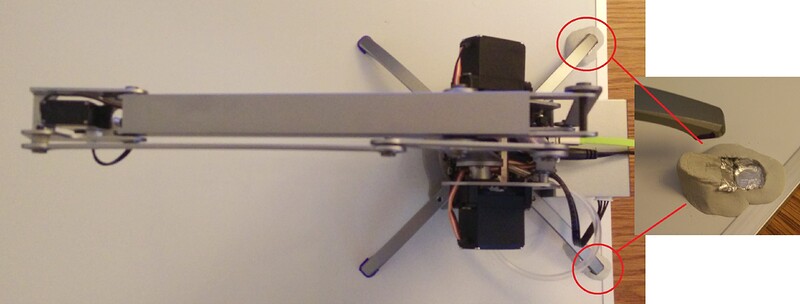
I didn’t use tape to fix my robot, but instead used sculpting clay and made a solid mount. If you do this, make sure to not permanently stick clay to your robot leg, but rather put aluminum foil around the robot’s legs, and then make a nice foothold for the robot to rest in (as shown in the picture below).
If you choose to use tape, I suggest using duct tape and making absolutely sure that the robot won’t move around as it runs the clock program. Any movement would compromise the location that the robot thinks the paper pieces are at.
Step 4: Placing the Paper Bank
Time to download the code! Download the code from this link. Place the ‘uArmClock.ino’ file into your arduino sketch folder, and place everything inside the ‘libraries’ folder into your arduino libraries folder inside of your sketch folder. Its important that you use the sketch folder that is generated by the Arduino IDE, otherwise it won’t know where to look for your sketch. If you don’t know where your sketch folder is, try ‘saving as’ and seeing where the IDE wants you to save to. That will be your sketch folder. Next, Plug your robots micro usb to the computer, and plug the robot to the power supply.
With everything in place, Open the ‘uArmClock.ino’ folder in your arduino sketch folder, click tools and select ‘arduino Uno’ as the type of arduino, select your arduino under the ‘port’ section, and upload the code to the robot.

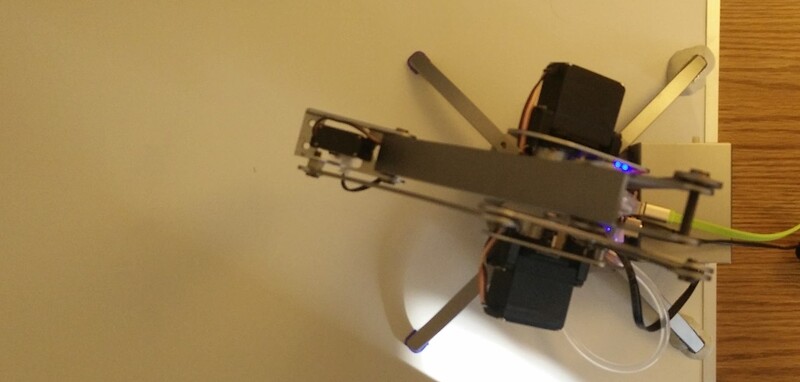
The robot will move to its normal position, as shown below.
Next, open up the serial monitor (Control+shift+M). Type “goto bank” without quotations. The robot will now move towards the location where the paper bank should be placed.

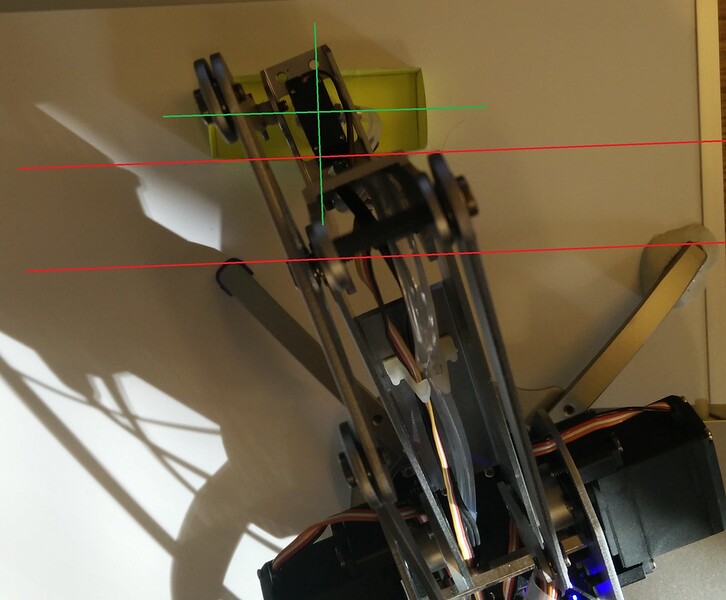
Now place the paper bank beneath the robots sucker. The sucker should be centered on the middle of the bank, and the bank should be rotated to match the picture below. The final step is to tape the bank to the surface. Make sure the robot is taped down before this step!
Next, open up the serial monitor (Control+shift+M). Type “goto bank” without quotations. The robot will now move towards the location where the paper bank should be placed.
Now place the paper bank beneath the robots sucker. The bank should be centered on the middle of the sucker, and the bank should be rotated to match the picture below. The angle of the paper bank (as shown below) should be parallel to the two legs of the robot on that side. The final step is to tape the bank to the surface. Make sure the robot is taped down before this step!
Step 5: Running the Program
It’s time for the fun part! Make sure your code is uploaded and your robot plugged into a power source and the computer. Now, open the Serial Monitor and type in the ‘minutes’ of the current time. For example, if it were 12:52, type 52. The robot will now begin to build the ‘52’. It will start with the first digit, and then go on to the second digit. If a minute has passed before it starts the second digit, it will adjust and start building the next number- so, if it takes a minute to build the ‘5’ it will build a ‘3’ next instead of a ‘2’ once it gets to the second digit. Here’s a video of what your final project should look like.
Have fun with your new robotic clock!


